Showing posts with label cupcakes. Show all posts

Tuesday, February 21, 2012

malted. and baked.


In the town I grew up in, there's this family restaurant. I loved going there because they had the best sundaes...I mean, really, it has "ice cream parlor" in its name. And one of my favorites had malt powder on it, cleverly dubbed the 'dusty road'.

In recent years, I've discovered baking with malt powder, instead of just sprinkling some onto my ice cream or mixing it up with some milk. I made Pioneer Woman's malted milk chocolate chip cookies for the hubs' family at some point, and now they're always in high demand. Sought after at every family gathering...or even a quick visit to say hi. I'm strongly questioned when I don't come bearing said cookies. And if I didn't make any, it must mean there is a dysfunction in my mental state. 

So now, I always have malted milk powder in my pantry. I also bought some Ovaltine Classic Malt, so I wouldn't dip into my baking products. Now I mix it with some almond milk. Mmmm...so good. And since I'm trying to make better choices, I sprinkle some on my oatmeal. I mean, it can't be all bad...there are vitamins and minerals up in my malt. ;) You should try it. You won't be sorry. 

But the other day...brilliance! I had some frozen mini vanilla cupcakes that I was looking to fix up. And lo and behold, as I was flipping through one of my Christmas gifts from my sister-in-law, [Baked. Have ya heard of it?] I came across their malted milk chocolate sauce recipe. But since this sounded like it'd be better paired with some chocolate cupcakes, I changed it up a bit.


Normally, if and when I freeze my cupcakes, I individually wrap each one with saran wrap, and then place them in freezer bags or freezable plastic storage. However, for some reason, I just threw these into a freezer bag. So the cake got a little dry. Hence the search for a syrup. And if I have a malted syrup on my cupcake, I gotta have some malted butter cream. Such a good decision. 


Malted Milk Chocolate Sauce
adapted from Baked: New Frontiers in Baking

Ingredients
2/3 cup heavy cream; I used 3/4 cup and added some milk too
1/3 cup light corn syrup
1/4 cup chocolate malt Ovaltine; I used Original malt, plus extra for taste
1/4 cup firmly packed light brown sugar
1/2 teaspoon salt
6 ounces milk chocolate, coarsely chopped; I omitted this
2 tablespoons unsalted butter
1 teaspoon pure vanilla extract

*Note: the original recipe is meant to be more of a sauce for various desserts. I wanted mine to run thin in order to moisten my cupcakes, which is why I added more cream and milk. The directions are for what I did in my kitchen.

Directions:
In a medium saucepan, combine cream, corn syrup, Ovaltine, brown sugar, and salt. Bring to a boil. Stir until well-blended. Simmer. Add milk and original Ovaltine until desired consistency and flavor is reached. Heat until soft boil, while stirring occasionally.

Remove from heat and mix in butter and vanilla. Let sauce cool. 

Cut out the middle of your cupcake (I did a cone shape). Spoon some sauce into the middle. Replace cake. Drizzle more sauce over the top of it (I poked some holes with a toothpick, just to make sure the sauce got all up in there :D)

And then I finished off the cupcake with the butter cream.


Malted Milk Butter Cream
adapted from Betty Crocker

Ingredients:

1/4 cup butter, softened
2 cups powdered sugar
2 tablespoons malted milk powder; I used 1/4 cup combo of malted milk powder and Ovaltine, cuz I'm crazy like that
1 tablespoon unsweetened cocoa; I omitted this
2 tbsp milk, plus more if desired

Directions:

In mixing bowl, cream butter until smooth. Add powdered sugar, malted milk powder and 2 tbsp of milk. Mix. Add more milk for a smoother consistency. Place into piping bag and frost your cupcakes. 

And then I dug through my pantry because I swore I bought some Whoppers at some point. So I chopped some up and garnished these babies. Cuz a little more malt won't hurt you.


I was told that these are "FRICKIN AMAZING!!" and "unreal!!" -- so in spite of my cupcake-freezing mishap, I think I made some good cupcakes. 

I've also now concluded that malt saves everything. And helps you choke down your oatmeal.

Monday, January 9, 2012

distractions.

Did you know that having your basement flood right before Thanksgiving causes one to go berserk?
I went berserk.
I literally just finished an order, and the next morning, we’ve got water in our finished basement like we’re trying to fill up a new indoor swimming pool. That we didn’t want.
Luckily, the hubs and I were home at the time and discovered it rather quickly. So I’m grateful for that. Because it could’ve been much worse had we been at work and found it when we got home. We got a plumber and the insurance guys to come and work everything out, from getting assessed to having our damaged floors ripped out. It all eventually was taken care of.
But it definitely put a damper on my holiday baking.
Well, that and just being a new homeowner period. In addition to our "basement remodel", our house had to be readied for the upcoming holidays…including our first time hosting Christmas. With my parents coming to visit and staying with us.
And in that time between having random men coming in and out of my home (for various flooring visits), I was finally invited to Pinterest. Which for those of you who don’t know already…it’s a time sucker, just like your favorite social networking sites. Only more interesting.
It is quite addicting – finding things that you like, or new things that you never knew you can’t live without, or ideas that you hope to execute someday…and all these things that you want to remember you can pin to virtual boards for you to refer back to at your convenience. Any interest you have, you’re covered. There are recipes, educational tips, vintage cars, fitness routines, hot vacation spots…I mean, I could keep going.
My time had been spent scouring the DIY and holiday boards so I could decorate our humble abode. So wreaths and bows took the place of cookies and cupcakes. It was fun until I realized I hadn’t really baked anything. And then it was the holidays and everyone was at our house, so I couldn’t dwell on it anymore. It’s a new year, and I’ve got new things baking up. After I finish a couple more Pinterest-inspired projects. ;)
And to thank you for listening to my Pinterest babble, let me catch you up on goodies since October. These were the happenings from my kitchen:


Engagement party & Tailgate (with a chili cook-off)
     Sugar cookies decorated with butter cream frosting.


Many guests were Michigan State alum and/or fans.
The happy couple sharing some sugar.


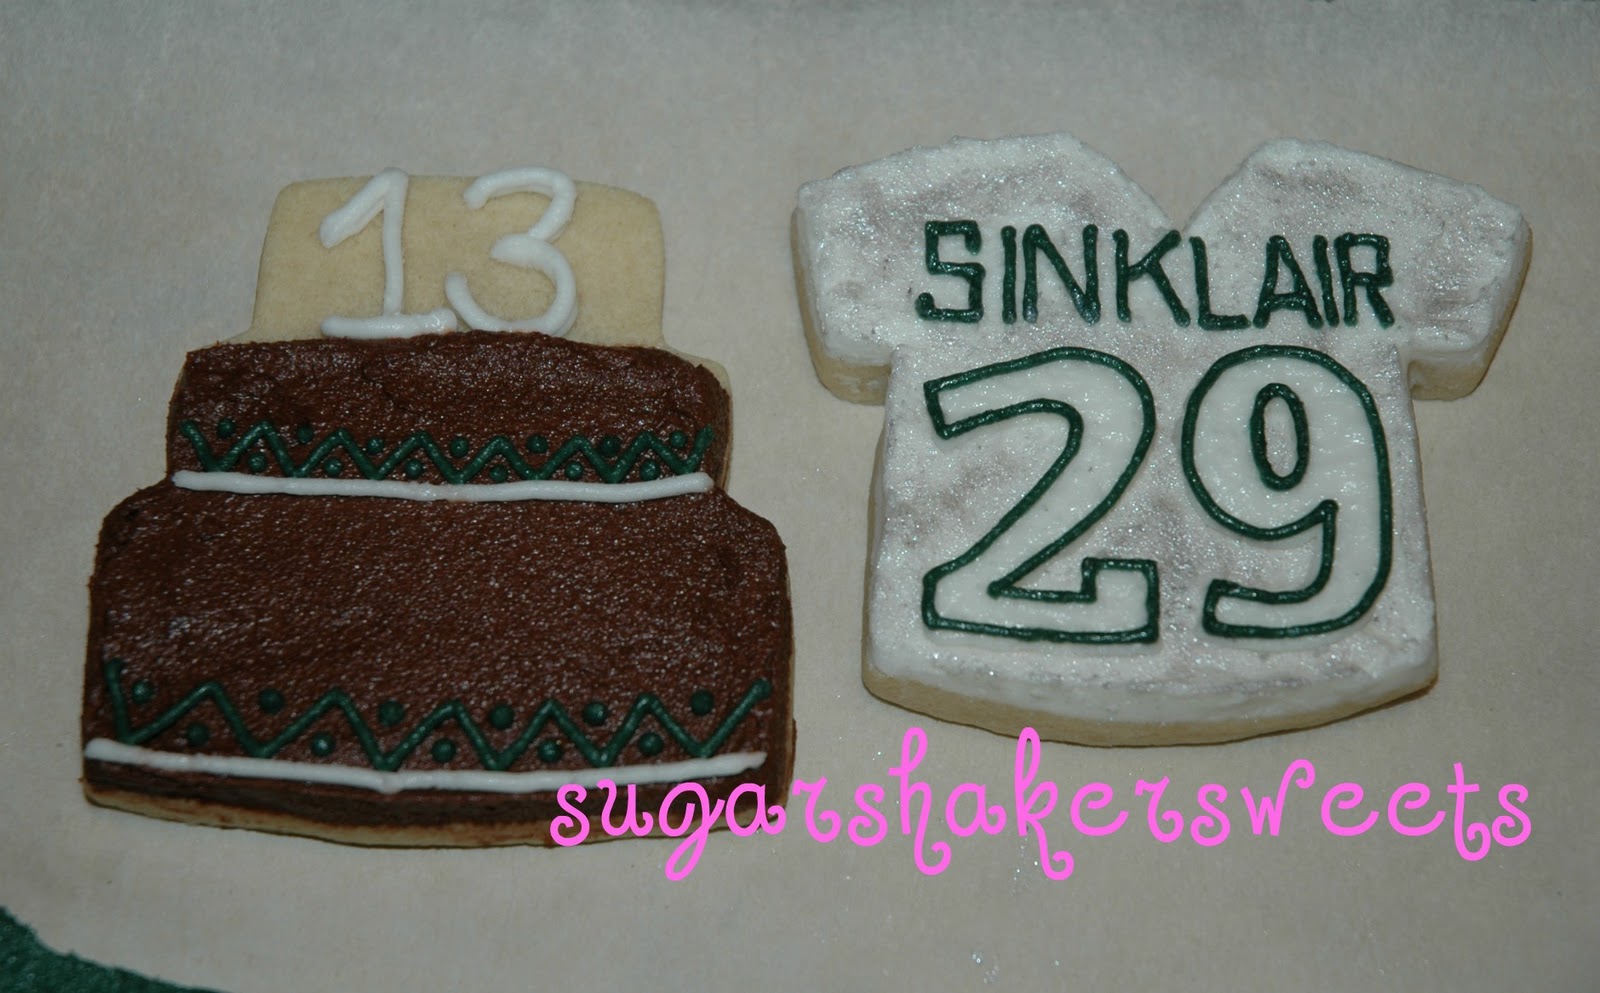
 Thirteenth Birthday 


Sugar cookies decorated with butter cream frosting. I studied his football jersey to make sure I got it right!

Chocolate cake, filled with Oreo butter cream, covered with dark chocolate butter cream.
Sent from my sister: The cake decorated with the sugar cookies.


Thanksgiving Family Get-Together
Pump'kin Patch cupcakes (pumpkin cake with cream cheese frosting)
Just Like Heaven cupcakes (chocolate cake, nutella ganache, caramel frosting, toffee bits garnish)


The branches and paper flowers posing with the cupcakes was my first Pinterest project. ;)


Christmas Family Get-Together
Red velvet and chocolate cake pops 


Santa's belt, snowflakes, and holly & berry wreaths for a festive holiday celebration.


How to decorate these cake pops:
I go back and forth with using decorating bags and tips when I'm decorating with candy melts. I feel like I spend more time going back and forth between the table and the microwave because the melts harden more quickly in the tip, even if the rest is still warm/usable. I often just use toothpicks instead.

Santa's belt:
  • Use black candy melts, black sanding sugar, and silver sanding sugar
  • Dip a toothpick in your smooth black candy melt and "paint" on a line in the middle of the cake pop, about 1 cm thick. Coat with black sanding sugar.  Note 1: I usually would do half of the belt and then sugar, then finish the other half of the belt and sugar. This is to prevent the candy melt from hardening before you sugar it. Note 2: It's best to have parchment paper beneath your workspace, making it easier to save your sugar and pour it back into its container. I also do one color at a time to avoid mixing colors.
  • Repeat for remaining cake pops.
  • Dip your toothpick in the candy melt again. Paint on a small rectangle for the belt buckle. I made the rectangles thin to prevent them from turning out more square, since it turns out 'thicker' once you add the sugar.
  • Coat with silver sanding sugar. (Some people like yellow or gold for the buckle, but I like silver...so your choice!).
Snowflakes:
  • Use white candy melts, white sanding sugar, and white snowflake sprinkles.  Note: I used two different types of sprinkles to differentiate cake flavors; i.e. sanding sugar = red velvet, snowflakes = chocolate
  • For sanding sugar snowflake. 
    • Dip a toothpick in your smooth white candy melts. 
    • Draw two lines like a + sign. 
    • Add small slanted lines like \/ at the end of each line (it should look like kind of like an arrow's end). 
    • Coat with white sanding sugar.
    • Add four more smaller lines in between the open spaces in your + and small slanted lines at the ends of these lines.
    • Coat with white sanding sugar. 
  • For snowflake sprinkles.
    • Lay out your sprinkles in the design that you want.
    • I made one long line of 5 snowflake sprinkles, then branched out four short lines of 2 sprinkles each (the cake pop gets crowded real quick!) Think of an asterisk shape *
    • Dip a toothpick in your smooth white candy melts.
    • Dot in the center and place your first snowflake. Note: I used dots versus lines so you can see the snowflakes clearly.
    • Repeat with remaining snowflakes. 
Holly & berry wreaths 
  • Use green candy melts and holly berry sprinkle mix (in a small shallow bowl).
  • Instead of a toothpick, use a small tool to create your circle for the wreath. I used the screw cap from one of my small plastic decorating bottles. 
  • Dip the cap (or whatever circular tool you chose) in your smooth green candy melts.  
  • Carefully place cap on your cake pop. Be sure that your circle is complete. Repeat dip if necessary.
  • Dip cake pop in holly & berry mix, or sprinkle them over your circle. Note: Dipping the cake pop can spread the candy melt out a little bit, making your wreath a little wider. I used both methods to see what worked best -- dipping is obviously not as messy, but sprinkling creates a more defined wreath (If you look at my second picture with all of the pops together, see the front two wreaths? The one on the left was dipped, and the one of the right was sprinkled).
Despite the fact that the winter holidays are now over, I hope you will "pin" my short  tute so you can reference it for 2012's holidays. ;)  And, I wish I could provide images to show each step, but 1, I was still in berserk-dom, and 2, I'm just not that organized when I bake. And 3, I'm terrible at doing a visual step-by-step on my own, and I couldn't dare bother the hubs while he's playing a video game...gasp! 
 
I hope you've enjoyed my 'recent' happenings. Now I'm off to Pinterest to find some more inspiration :D
 

Monday, October 31, 2011

dressing up for halloween.

Sometimes I wish I was crazy about Halloween. I like the idea of getting into costume and/or make-up and being someone, or something, other than myself. However, I'm not creative. And I feel like being Asian and not skinny really limits my pre-made costume options. That and I don't like shelling out $30plus for a costume that I'll only wear once.

Even as a kid, I didn't really dress up. I can only remember three costumes:
1) A couple years in a row I was a cheerleader. And it wasn't a cute costume...it was that nylon/polyester material that was stretchy and kinda shiny...and terrible. 
2) Another year I was a police officer. My sister's bf at the time had a sheriff's badge, and I found an old police shirt at a thrift store. I wore black pants and my imitation Doc Martens. I thought I was badass. Hahaha.
3) One year in high school, I was an angel. I wore a white dress and the typical white, wired angel wings with the silver glitter detail. Nothing exciting or original.  

Last year, I discovered that the high school that I work at is very big into Halloween. I was told I *had* to dress up or I would stick out like a sore thumb. So I stressed. What costume could I get where I could still function (and walk through crowded hallways) and not get fired over for being too revealing? Options were limited. So what did I go as?

A newsie. Hopefully you know what I'm talking about.

This year, I couldn't decide what to do. So I walk with a low head as I make my way through the hallways.

Instead of shopping in search of inspiration for a costume, I searched for decor and other such unnecessary items that would make the hubs question: "What is that for?" or "Why do we need that?" But I can't help it. I love going to the stores when they change over their holiday-related merchandise. A month or so ago, I came across these:


And though it may be predictable to use these special marshmallows to make the beloved crispy rice cereal treats, in the spirit of Halloween, I dressed them up a little.


Pumpkin Spice Rice Crispy Treat Cupcakes

Ingredients:
Dulce de Leche:
1 can sweetened condensed milk
hot water

This takes the longest, so it's best to do this first (even a day or so before).
Pour sweetened condensed milk into a 9 inch pie plate. Place plate onto the center of a baking sheet with edges. Place in preheated oven to 425 degrees. Pour hot water around the outside of the pie plate (into the edged baking sheet). 

Bake for an hour, covered with foil. Dulce de leche should be a thicker consistency and caramel-colored. Transfer to a mixing bowl and whisk until smooth.

Since I pre-made my dulce de leche, I used mine straight from the fridge. This can be stored in a glass jar in the fridge for up to one month.  

Crispy rice treats
1 bag pumpkin spice marshmallows
1/4 cup (1/2 stick) butter
~5-6 cups of crispy rice cereal

In a large bowl, melt the butter. Add marshmallows and stir. Microwave 45 seconds and stir. Microwave another 45 seconds, then stir until marshmallows are melted together. Add cereal and mix until it's well coated. 

Press cereal mixture into lined cupcake pan and form a mound with the cereal on top. Repeat until all of the cereal mixture is used up. Let cool.


Spoon dulce de leche over molded crispy rice treats. If you spoon over too much, you may have to use a finger to wipe it up. Just sayin'.

Topping:
white chocolate or vanilla almond bark
Halloween/autumn themed sprinkles

Melt chocolate or bark in 30 second increments in the microwave.

Dip crispy rice treats (already topped with dulce de leche) into melted chocolate/bark. Top with sprinkles.

Let chocolate/bark harden. Then, ENJOY!

Note: These are great minus the "costume", but they're not as festive ;) Besides, the dulce de leche and white chocolate are definitely a welcomed bonus.

Monday, October 24, 2011

of course i eat fruit.


I try to eat healthy. Honest. The problem is, I *love* junk. It's so good to me. I'd rather have a waffle with some pumpkin spice kisses melted on the inside, instead of oatmeal...or anything of that nature. I even try to make my own breakfast sandwiches with whole grain, fiber-rich English muffins and turkey sausage, instead of stopping at the golden arches every morning. I've tried leaving out the cheese, but who am I kidding? (Side bar: My mom once told me to stop eating cheese so I wouldn't be so fat. So I cut it out of my diet for a while. And perhaps it was coincidence that I lost a couple pounds. But then I realized I'd rather be fat and cheesy, than skinny with no cheese. It's made a world of difference. And probably a few pounds.)

So to make up for my lack of "right" choices, I try to eat fruit (veggies are a whole 'nother story). I love my honey crisp apples, so during this time of year, I'm good. The hubs eats a banana and apple every day. So I try to eat a banana every day as part of my breakfast. Only...after Monday hits, I'm usually banana-ed out. Therefore, my uneaten bananas get a little brown. And the hubs won't touch a banana with one speckle of brown on it. Seriously.

On a good week, I'll save the ripened bananas, unpeel them, and freeze them, like so many bloggers do. And I love my banana nutella muffins (I throw some flax or chia seed up in there, just to make myself feel better). But honestly, I can banana nutella muffin myself out too. I know what you're thinking...I must be crazy, right? What can I say though? I like variety.

Now, one of my favorite restaurants is The Melting Pot. (There's a connection here, I swear it.) If you've never heard of this restaurant, it's all about fondue. It's especially great when you're catching up with your besties or old friends...some go for a romantical night out -- unfortunately, the hubs hates TMP (blasphemy!).

Anyway. The restaurant offers different flavors of chocolate fondue for dessert. A few years ago, they started offering a bananas foster fondue. Y.U.M. I'd never had bananas foster, but ohmygoodness was that fondue delicious. And immediately I thought, I *totally* want to make this into a cupcake! Fast forward to recent times, and naturally, I am not the first person with this brilliant idea.

So a few weeks ago, when my uneaten bananas made their way into the fridge to prolong their ripeness, I decided I was finally going to do it. I was going to make bananas foster cupcakes.

I always like to start with a search, and then piece together and adapt what I want. What did I search, you ask? Bananas foster cupcake. And then I searched bananas foster fondue. You can't be disappointed. Initially, I wanted to make a little fondue bowl out of the cupcake, but decided against it since the fondue would have no way of staying warm. But tell me how fun it would be to dip your extra cupcake piece into your bananas foster fondue cupcake bowl.

The actual result? Banana cupcake, lightly drenched in a banana rum sauce (the fondue "sludge" minus the white chocolate), topped with white chocolate butter cream, a couple of banana slices, and more sauce. Um, yah. EXACTLY that.


Thankfully, I had a couple of small gatherings with friends, and then I brought some in for my co-workers. I'm pretty sure I was everyone's favorite person. And that's always nice. To be the bringer of fruit, cupcake, AND happy feelings? Life is good. And so is this cupcake.

The fresh bananas on top and the banana cake balance out the rich, sweet taste of the white chocolate butter cream. And the banana rum sauce gives the cupcake a little something extra, without making it soggy. It's a perfect way to get a portion of your daily fruit intake! Now if only I had some left over...


Wednesday, October 5, 2011

baking baby.

If you follow me on Facebook, then you may (or may not) know that the hubs and I just moved a couple months ago. As I packed up my old kitchen, I dreamt about the cake plates and platters and such that have been stored in the garage over the years. And then I organized my baking supplies into gigantic storage containers, dreaming of using it all, and having it all easily accessible to me, now that they would have a dedicated place in our finished basement.

For a couple weeks after we had finally moved in, I was still in denial about having to cook again...I was under the impression we could get take out for dinner every night, despite the fact that our entire kitchen was unpacked, organized, and clean (oh yah, and that we now had a mortgage to pay).

Slowly but surely, though, I began getting to know my new oven. I started by acquainting myself with her friend, the stove. Then I worked up the courage to start courting her, with easy things, like frozen french fries (seriously people...the hubs and I have been eating out since May...I've kinda forgotten what real veggies are). 

Rather quickly, things got a little more serious. We spent more and more time together, as I worked my way up to a casserole and meals of the sort. And then...we decided...it was time. Our first time together was magical, and we made beautiful chocolate chip whoopie pies. 
So. Good. 
It almost made me forget about the past four years that I spent with my old oven. And what makes this relationship more exciting is the fact that I get to use all the things I had been longing to break out.


We've been baking together as much as my schedule allows, and I got my first official order based out of our new location. Baking with my new baby for a new baby. 

One little buggy adorned the sweet invitation, so naturally buggy cookies had to be made.

And of course some onesies.

Stripes, houndstooth, and polka dots. Perfect patterns for baby boys.

S'mores cupcakes: graham cracker crust, graham cracker and chocolate chip cake, marshmallow frosting .
Caramel Mocha cupcake: vanilla cake, caramel filling, mocha butter cream, chocolate covered espresso beans garnish.

Cupcake toppers to display a sweet message for the shower guests.

I must say, it was nice getting prepped to bake, since everything was organized much better than I had it in our other place. All of my icing bottles were in one place. My treat bags and boxes were all together. It was lovely. I could definitely get used to this.
 
It's nice to finally feel settled. Perhaps I'll go make s'more whoopie with the hubs my oven. hee hee ;)

Wednesday, March 23, 2011

i got this icebox where my [stomach] used to be.

Oh Omarion. 

I used to dance like that. In my mind. hehehe. I suppose I'll stick to baking.

As St. Patrick's Day just passed and the smell of Shamrock Shakes lingers in my car, I was itching to bake something related to this glorious Irish holiday. Now, I'm not Irish. I think the hubs is a fraction Irish? And I think I only went out once to celebrate during my college years [the city is out of control, and it's not because they dye the river green].

So why the interest, you ask? Well, the Irish are known for their indulgent adult beverage intake and strong livers. I wanted to pay tribute to this by incorporating such special ingredients. My first choice: Bailey's. It seemed natural to use it, and it played nice with my homemade whipped cream.

A couple weeks ago, I was searching icebox cakes and stumbled upon this blog. I know I've read her blog before, but not regularly. I'm not sure why not though. She's a woman after my own stomach -- she created cupcakes instead of the usual icebox cake. Following her cue, it only made sense to use the icebox wafers with my Bailey's whipped cream. They're so cute!


Bailey's Whipped Cream
(I'm sure this is out there, but this one's from my tastebuds)
Ingredients:
1 c heavy whipping cream

4 tbsp Bailey's Irish Cream (or to taste)
1/3 c powdered sugar (or to taste)

Directions:

Mix heavy whipping cream on medium-high until soft peaks form. Add Bailey's and sugar. Whip until well incorporated and cream is more firm.

I think the sugar enhanced the Bailey's flavor...this could very well just be in my head. I actually started with just the Bailey's, and then added the sugar after I wasn't getting the taste I was looking for. I might have added a little bit more than 1/3 cup of sugar too...but it was definitely less than a 1/2 cup! So that's not too bad, right?


And since I was already in the supermarket aisle seeking out the Bailey's, I figured that I might as well grab some Guinness. Even though I don't drink the stuff (or its wheat/barley counterparts), I knew of recipes that called for it. Over the past years that I've spent blog-stalking, these recipes had always intrigued me, so I caved and threw some in my cart. How convenient it was for the morning news to do a segment on Irish dishes the day after my purchase.

If you scroll down on that page, the recipe for the Guinness cake is there, and I used it to a 't'. Except!! I made cupcakes. Of course I made cupcakes instead, silly! I baked these with cupcake liners at 350 degrees Fahrenheit for 17-18 minutes or until a toothpick comes out clean.


Bailey's Cream Cheese Frosting
adapted from Wayne's Weekend
Ingredients:
8 oz. cream cheese, softened
4 tbs. butter, softened
1/2 tsp. cinnamon
1-1/3 c. powdered sugar
1/4 c. heavy whipping cream
1/4 c. Bailey's (or to taste)

Directions:
Cream together the cream cheese and butter. Add cinnamon. Slowly incorporate powdered sugar, alternating cream and Bailey's to get a stiffer, but spreadable frosting (the Bailey's will quickly make the frosting very runny, so be careful!). 


I could definitely get used to Guinness in cupcake form. This was such a good cake! I'm mostly surprised because of said beverage. Who knew barley and hops could taste so yummy? I thought the frosting was a nice balance for the cake. My oldest sister sent me a different link to a similar recipe, but that one included a Bailey's chocolate ganache. I thought about incorporating it into my cupcake, but I didn't have the time. Perhaps next year...and I'll work on having them ON the actual day. 

You'll see that I have an abundance of ideas; I just have a hard time executing them 'on time'...or at least blogging about them on time. I'm working on my timeliness. Honest. In the meantime, you can search through my labels ;) The least I can do is be organized for you!

Happy St. Patrick's Day Wednesday!